Table of Contents
ToggleKey Takeaways
What is the best homemade turkey seasoning blend?
The best homemade turkey seasoning blend includes garlic powder, smoked paprika, rosemary, sage, thyme, oregano, black pepper, mustard seeds, nutmeg, bay leaf, and dried lemon for balanced flavor.
When is the best time to season turkey for maximum flavor?
Seasoning turkey 12–24 hours before roasting delivers the deepest flavor and juiciest texture. Overnight dry brining gives the best results.
Should turkey seasoning be applied under the skin?
Yes. Applying seasoning or herb butter under the skin directly on the meat dramatically improves flavor, moisture retention, and tenderness.
Is dry rub better than a wet marinade for turkey?
Dry rub is better for crispy skin, grilling, smoking, and roasting, while wet marinades are better for extra moisture and deep flavor infusion.
Why is herb butter under the skin so effective?
Herb butter melts inside the meat during roasting, basting the turkey internally, keeping the breast juicy, and creating rich gravy drippings.
Can you combine dry rub and herb butter for turkey?
Yes this combination delivers competition-level results: juicy meat from the butter and ultra-crispy skin from the dry rub.
How do you store homemade turkey seasoning safely?
Store in an airtight glass jar, away from heat, light, and moisture. Shelf life is up to 6 months in cool, dry conditions.
How does humidity affect turkey seasoning storage?
In humid climates, always use desiccant packs, sealed jars, and avoid storing near heat sources to prevent clumping and flavor loss.
What temperature gives the best roast turkey texture?
Start roasting at 220°C (428°F) for 30 minutes, then reduce to 175°C (347°F) to finish cooking evenly with crispy skin.
Can turkey seasoning burn during roasting?
Yes, especially blends with sugars. To avoid burning, tent loosely with foil, roast at moderate heat, and avoid excess surface sugar.
Does homemade turkey seasoning taste better than store-bought?
Yes. Homemade blends deliver stronger aroma, cleaner taste, no fillers, no anti-caking agents, and customizable heat levels.
What is the fastest way to season a turkey if short on time?
Use a dry rub applied directly to dry skin, rest for at least 30–60 minutes, then roast for fast, flavorful results.
What’s the best seasoning method for deep-fried turkey?
Only use a dry rub for deep frying. Never use butter or wet marinades on fried turkey due to flare-up and safety risks.


Impu Irani is the cookbook author behind Leena Spices , where he shares easy homemade spice blend recipes and practical cooking tips. Read more about him at the end of this post.
What herbs and spices are essential in a classic roast turkey seasoning?
Essential Herbs and Spices for a Classic Roast Turkey
For the best results, this recipe relies on the rich, aromatic flavors of Garam Masala as its secret ingredient, bringing depth and warmth to your blend.
Creating a perfectly seasoned roast turkey is about balancing aromatic herbs with warm, flavorful spices. Here is a carefully curated list of herbs and spices that form the backbone of classic turkey seasoning, along with their culinary roles:
- Basil – Adds a subtle, sweet herbal note that complements poultry without overpowering it.
- Bay Leaf – Infuses a gentle earthy aroma, ideal for slow roasting and brines.
- Bell Pepper – Provides mild sweetness and a hint of color to your seasoning blend.
- Black Pepper – Offers sharp, warm heat that enhances the natural flavors of turkey.
- Garam Masala – A touch of this aromatic Indian spice mix can add depth and warmth for a slightly exotic twist.
- Garlic Powder – Delivers savory richness and a roasted garlic aroma without the moisture of fresh garlic.
- Dried Lemon Peel – Adds bright citrus notes that cut through the richness of the turkey.
- Nutmeg – Introduces a subtle sweet-spicy warmth, perfect for balancing richer flavors.
- Oregano – Provides a slightly peppery, herbaceous flavor that pairs beautifully with poultry.
- Smoked Paprika – Brings a mild smokiness and vibrant red color, elevating the roast visually and aromatically.
- Rosemary – Its pine-like aroma is a classic companion to roasted turkey, especially when paired with garlic.
- Sage – Offers earthy, savory notes, essential in traditional Thanksgiving-style seasoning.
- Thyme – A versatile herb that adds gentle earthiness and complements both poultry and stuffing.
- Yellow Mustard Seeds – Impart a subtle tangy warmth and complexity, particularly when crushed and added to rubs or brines.
Pro Tip: Combining fresh herbs like rosemary, sage, and thyme with dried spices such as garlic powder, smoked paprika, and nutmeg creates a layered flavor profile that penetrates the turkey for a juicy, aromatic roast every time.
Where can I buy Turkey spice blend?
You can buy Pure and Authentic Turkey Spices From Amazon
You’ll find several reputable brands offering pre-made blends in both small jars and bulk packs.
CLICK HERE
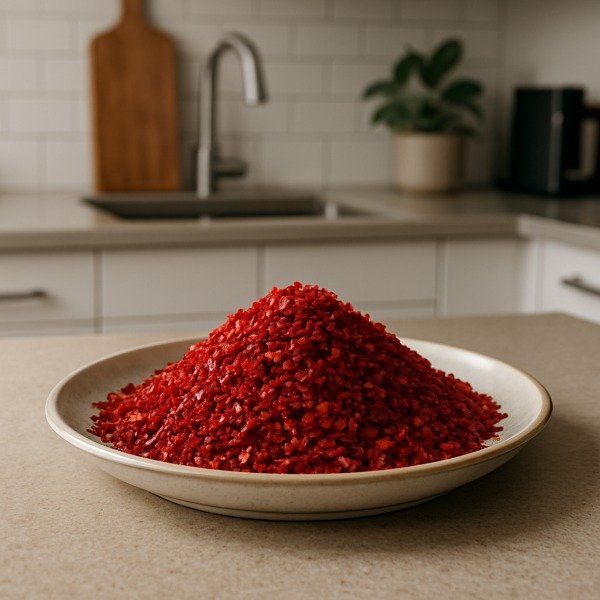
How to Make Your Own Homemade Turkey Seasoning Blend
Nothing beats the aroma and flavor of a turkey seasoned with a fresh, homemade spice blend. Making your own turkey seasoning is simple, allows full control over flavors, and ensures no unwanted additives. Here’s a step-by-step guide to creating a perfectly balanced, all-purpose roast turkey seasoning.
Ingredients
- Basil – 3g
Adds subtle sweetness and herbaceous notes. - Bay Leaf – 3g
Provides earthy depth and enhances the savory flavors. - Bell Pepper – 3g
Gives mild sweetness and a gentle, fruity aroma. - Black Pepper – 3g
Adds warm, sharp heat to elevate the other flavors. - Garam Masala – 7g
A warm, aromatic spice mix that gives your turkey a slightly exotic depth. - Garlic Powder – 13g
Infuses a rich, roasted garlic flavor that penetrates the meat. - Dried Lemon Peel – 5g
Brings bright, citrusy notes to balance richer flavors. - Nutmeg – 3g
Offers subtle sweet-spicy warmth, perfect for aromatic layering. - Oregano – 5g
Provides a peppery, earthy tone that complements poultry. - Smoked Paprika – 13g
Adds gentle smokiness and vibrant red color to the blend. - Rosemary – 13g
Classic pine-like aroma that pairs beautifully with turkey. - Sage – 13g
Earthy and savory, a traditional herb for poultry. - Thyme – 13g
Delivers a gentle, versatile herb flavor that ties the blend together. - Yellow Mustard Seeds – 3g
Adds subtle tanginess and warmth, enhancing the overall complexity.
Step-by-Step Instructions
- Measure Accurately
Use a digital kitchen scale for precise measurements. Accuracy ensures balanced flavors in every batch. - Crush or Grind Whole Spices
If using whole mustard seeds or dried herbs, lightly crush them in a mortar and pestle. This releases essential oils for maximum aroma. - Combine All Ingredients
Place all measured herbs and spices into a clean, dry bowl. - Mix Thoroughly
Stir until the blend is uniform. Ensure no clumps remain and the colors and textures are evenly distributed. - Store Properly
Transfer the seasoning into an airtight glass jar. Store in a cool, dark, and dry place. This will maintain freshness and potency for up to 6 months.
Tips for Maximum Flavor
- Adjust to Taste: Feel free to tweak quantities, more rosemary or sage for a traditional flavor, or a bit more garam masala for a subtle exotic twist.
- Enhance Juiciness: Rub the seasoning under the turkey skin and inside the cavity for deeper flavor penetration.
- Versatile Use: This blend works not just on turkey but also chicken, roasted vegetables, and even soups.
Is it better to use a dry rub, wet marinade or herb butter under the skin for turkey?
1. Dry Rub: Crisp, Flavorful Skin
A dry rub is a simple blend of herbs, spices, salt, and sometimes a touch of sugar that is rubbed directly onto the surface of the turkey. It is one of the fastest ways to build bold flavor and achieve that irresistible golden, crispy finish.Why Use a Dry Rub?
Dry rubbing is all about surface flavor and texture. As the turkey cooks, the spices form a flavorful crust while the skin browns beautifully. There’s no soaking, no waiting, just season and cook.Key Benefits
- Creates a deeply flavorful crust when roasted, grilled, or smoked
- Enhances browning for picture-perfect golden skin
- It is quick and convenient with no long marinating time required
- Helps seal in natural juices while crisping the exterior
- Ideal for high-heat cooking methods
Limitations to Know
- Flavor stays mostly on the surface, with limited penetration into the meat
- Doesn’t tenderize the way a wet marinade does
- Rubs with high sugar content can burn quickly if heat isn’t well controlled
Best Use For
Dry rubs are best when you want maximum crispiness with minimal prep, especially for:- Grilling
- Smoking
- Frying
- Quick roasting with crunchy skin as the main goal
2. Wet Marinade: Deep Flavor & Moisture
A wet marinade is made by combining liquids such as oil, citrus juice, vinegar, soy sauce, or broth with herbs and spices. This mixture doesn’t just sit on the surface. It soaks into the meat, tenderizing it while building deep, layered flavor.Why Use a Wet Marinade?
Wet marinades work at a structural level. The acids and enzymes help break down muscle fibers, making the turkey softer, juicier, and more flavorful from the inside out. This method is perfect for tangy, Asian-style, or bold global flavor profiles.Key Benefits
- Allows for deep flavor penetration, not just surface seasoning
- Tenderizes the meat, especially useful for firmer cuts
- Adds significant moisture, reducing the risk of dry turkey
- Excellent for long, slow cooking or roasting
Limitations to Know
- Requires several hours or overnight for best results
- Can cause soggy skin if the turkey isn’t dried before cooking
- Needs advance planning, container space, and refrigeration
Best Use For
Wet marinades are ideal when:- You have 4 hours or more to prep
- You want maximum moisture and tenderness
- You’re cooking tougher cuts of poultry or large birds
3. Herb Butter Under the Skin: Classic, Juicy, Flavorful
Herb butter is applied directly under the turkey’s skin, where a blend of butter, herbs, and spices melts slowly during cooking. This method essentially bastes the meat from within, keeping it exceptionally moist while infusing it with rich, aromatic flavor.Why Use Herb Butter?
Placing the butter beneath the skin allows the seasoning to come into direct contact with the meat, not just the surface. This is especially valuable for lean turkey breast, which tends to dry out easily. As the butter melts, it also enhances the pan drippings giving you a more flavorful gravy.Key Benefits
- Delivers deep, buttery flavor directly into the meat
- Keeps turkey exceptionally juicy, especially the breast
- Produces a beautiful golden, crispy skin
- Enhances gravy with rich, aromatic drippings
- Elevates both taste and visual presentation
Limitations to Know
- Takes extra time and care to apply properly under the skin
- Overuse can lead to greasy skin
- Adds extra calories and saturated fat
Best Use For
Herb butter is ideal for:- Oven roasting
- Festive meals and special occasions
- Situations where presentation, richness, and flavor impact truly matter
Combining Methods: The Ultimate Flavor Strategy
Many experienced cooks don’t rely on just one technique, but they layer multiple methods to achieve competition-level flavor, juiciness, and crisp skin. When used correctly, these techniques work together to create a turkey that is deeply seasoned inside and irresistibly crispy outside.Step-by-Step Pro Method
- Night Before – Dry Brine or Heavy Dry Rub Season the entire turkey generously with a dry brine or spice rub, including under the skin. This step begins the moisture-retention process while building early flavor.
- Herb Butter Under the Skin Gently loosen the skin and spread a thin layer of flavored butter directly over the meat. Popular options include:
- Garlic-scallion butter
- Chili-garlic butter
- Curry-leaf butter This infuses the meat with richness as it cooks.
- Refrigerate Uncovered Overnight Place the turkey uncovered in the refrigerator. This dries out the skin, which is the secret to achieving maximum crispiness during roasting.
- Two-Stage Roasting for Perfect Texture
- Start at 220°C (425°F) for the first 30 minutes to jumpstart browning.
- Reduce to 175°C (350°F) and continue roasting until fully cooked and juicy.
Pro Technique: Dry + Butter Combo
For oven roasting, use herb butter under the skin and a dry rub on the outside. This “wet-and-dry” method gives you:- Moist, flavorful meat
- Crisp, well-seasoned skin
- Deep, layered flavor from surface to center
Cooking Method Adjustments
- For Grilling or Smoking: Stick to dry rubs only. They create a strong crust and prevent flare-ups caused by dripping oils or marinades.
- For Deep Frying: Use only a dry rub. Any wet surface, butter, or oil can cause dangerous splattering and uneven cooking.
Quick Reference Guide
Method | Pros | Cons | Best For |
Dry Rub | Crispy crust, quick, seals juices | Less tenderizing, may burn if sugary | Grilling, smoking, frying |
Wet Marinade | Deep flavor, tenderizes, adds moisture | Long prep, risk of soggy skin | Tough cuts, long marination |
Herb Butter | Juicy, rich flavor, crispy skin | Time-consuming, may add fat | Oven roasting, special occasions |
Timing & Application Tips
For Maximum Crispy Skin
After seasoning, refrigerate the turkey uncovered for at least 12 hours. This dries out the skin, which is the key to achieving a deeply golden, crackly finish during roasting.
Apply Seasoning Under the Skin for Deeper Flavor
Gently loosen the skin over the breast and thighs, then apply your rub or herb butter directly onto the meat. This allows the seasoning to penetrate instead of just sitting on the surface.
Smart Wet-Rub Tip for Extra Flavor
Mix your dry spice blend with softened butter or olive oil to create a quick wet rub. Apply about 75% under the skin and the remaining portion over the outer skin. This gives you both juicy meat and a well-seasoned crust.
Prevent Burning During Roasting
To avoid over-browning or spice scorching, roast at a moderate temperature of 160°C (325°F). If dark spots form too quickly, loosely tent those areas with foil to protect the skin while the turkey finishes cooking.
How Long Should Your Turkey Sit After Seasoning?
Why Resting Matters
After seasoning, the turkey needs time for:- Flavor penetration – Salt and spices slowly work their way into the meat.
- Moisture management – Salt draws out moisture, dissolves in it, and is reabsorbed, tenderizing the meat.
- Even cooking – Letting the turkey sit at room temperature briefly helps the bird cook uniformly from edge to center.
- Crispy skin – Drying the skin in the fridge creates a “parchment-like” surface that browns beautifully in the oven.
Timing by Method
1. Dry Rub or Dry Brine (Salt-Based)
Timing Guidelines
- Minimum: 12 hours in the fridge for basic seasoning and modest crispiness
- Recommended: 24–48 hours for optimal flavor infusion and golden, crispy skin
- Maximum: Up to 72 hours for very large birds or when you want maximum depth of flavor
How It Works
- Apply your dry rub or salt-based brine evenly over the turkey, including under the skin.
- Refrigerate the turkey uncovered. The salt draws out moisture, which dissolves the seasonings. This flavorful liquid is then reabsorbed, seasoning the meat from the inside.
- Leaving the turkey uncovered allows the skin to dry thoroughly, ensuring a perfectly crispy roast.
Final Step Before Cooking
Remove the turkey from the fridge and let it sit at room temperature for 1–2 hours. This ensures even cooking and prevents the meat from being cold in the center, giving you consistently juicy results.2. Simple Dry Rub (Herbs & Spices Only)
Timing Guidelines
- Minimum: Apply immediately before roasting for quick flavor
- Recommended: 12–24 hours to let spices penetrate
- Maximum: Up to 48 hours for deeper seasoning
Tips for Best Results
- If leaving the rub on longer than 12 hours, keep the turkey uncovered in the fridge. This helps the skin dry out and ensures maximum crispiness.
- Ideal for smaller birds or when you want fast prep with flavorful results without a long brining process.
3. Herb Butter Under the Skin
Timing Guidelines
- Minimum: 2–4 hours before roasting for noticeable flavor infusion
- Recommended: 4–12 hours for optimal juiciness and aroma
- Maximum: Up to 24 hours
Best Practices
- Apply the herb butter under the skin the night before, then refrigerate the turkey uncovered. This allows the skin to dry slightly while the butter infuses the meat.
- Avoid leaving it too long, as the butter may soften the skin unevenly, reducing crispiness.
4. Wet Marinade or Wet Brine
Timing Guidelines
- Minimum: 12 hours for noticeable flavor and tenderizing
- Recommended: 24 hours for optimal moisture and depth of taste
- Maximum: Up to 48 hours as longer marination can risk texture issues
Tips for Best Results
- Ensure the turkey is fully submerged in the marinade for even flavor penetration.
- Before cooking, pat the turkey dry and let it rest at room temperature for 1–2 hours. This prevents steaming and helps the skin crisp properly.
Quick Reference Chart
Method | Minimum | Recommended | Maximum | Storage |
Dry Brine | 12 hrs | 24–48 hrs | 72 hrs | Uncovered in fridge |
Simple Dry Rub | Immediate | 12–24 hrs | 48 hrs | Uncovered in fridge |
Herb Butter | 2 hrs | 4–12 hrs | 24 hrs | Loosely covered |
Wet Brine | 12 hrs | 24 hrs | 48 hrs | Fully covered/submerged |
Hybrid (Dry Brine + Butter) | — | 24–48 hrs | 72 hrs | Uncovered for final drying |


“Goldilocks” Timing for Maximum Flavor & Crispy Skin
Day 1 (48 Hours Before Roasting)
- Pat the turkey dry to remove any excess moisture.
- Apply a salted dry rub (about 1 Tbsp kosher salt per 2 kg / 4.5 lb of turkey) evenly over the entire bird, including under the skin.
- Optional: Smear 2–3 Tbsp of flavored herb butter under the skin for extra richness and juiciness.
- Refrigerate uncovered or loosely covered to allow the skin to begin drying, which ensures maximum crispiness during roasting.
Day 2 (24 Hours Before Roasting)
- Remove any cover and leave the turkey uncovered in the fridge.
- This allows the skin to dry out fully, developing a parchment-like texture that is key for achieving ultra-crispy, golden skin during roasting.
This step ensures your turkey will have maximum crunch on the outside while remaining juicy and flavorful inside.
Day 3 (Cooking Day)
- Check the seasoning: Wipe off any excess salt if necessary.
- Layer flavors: Apply herb butter under the skin and a dry rub over the top for maximum aroma and taste.
- Optional resting: Let the turkey sit at room temperature for about 1 hour (no more than 2 hours for food safety) to promote even cooking.
Pro Tip: Modern tests show that roasting the turkey straight from the fridge produces nearly identical results while reducing food safety risks. This makes preparation simpler without compromising flavor or juiciness.
Quick Options When Short on Time
Time Available | Method | Expected Result |
2–4 hours | Heavy dry rub | Decent flavor, good skin |
6–12 hours | Overnight dry brine | Very good flavor, crisp skin |
24+ hours | Full uncovered dry brine | Restaurant-level juiciness & crispness |
Food Safety Tips
- Maintain safe fridge temperatures: Keep the turkey at below 4°C (40°F) throughout brining, marinating, or dry-rubbing.
- Limit room temperature exposure: Never leave the bird out for more than 1–2 hours to prevent bacterial growth.
- Thaw completely before seasoning: Ensure the turkey is fully thawed before applying any dry rub, wet marinade, or herb butter for even flavor absorption and safe cooking.
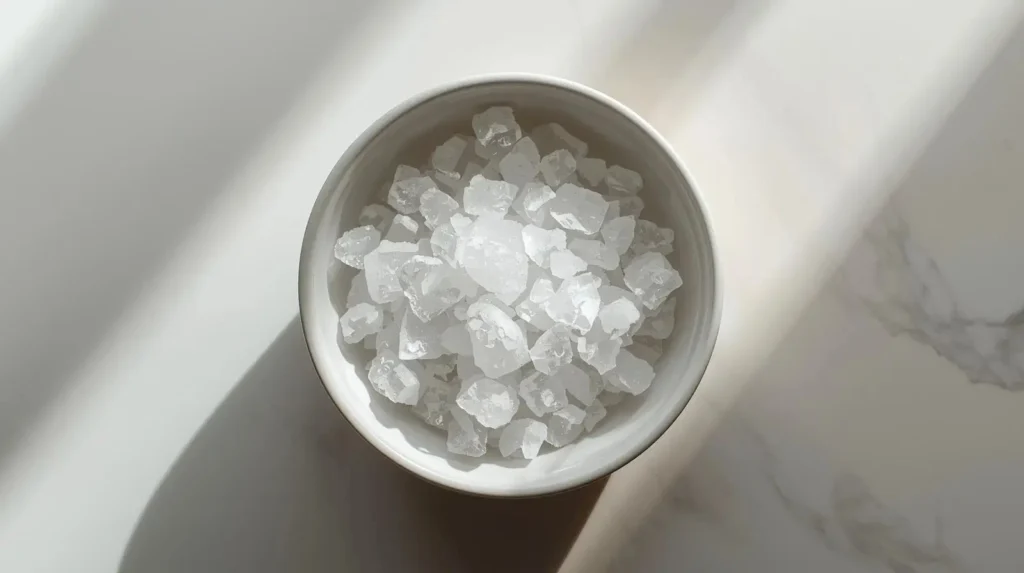
How do I store homemade turkey seasoning blend to keep it fresh longer?
How to Store Homemade Turkey Seasoning Blend for Maximum Freshness
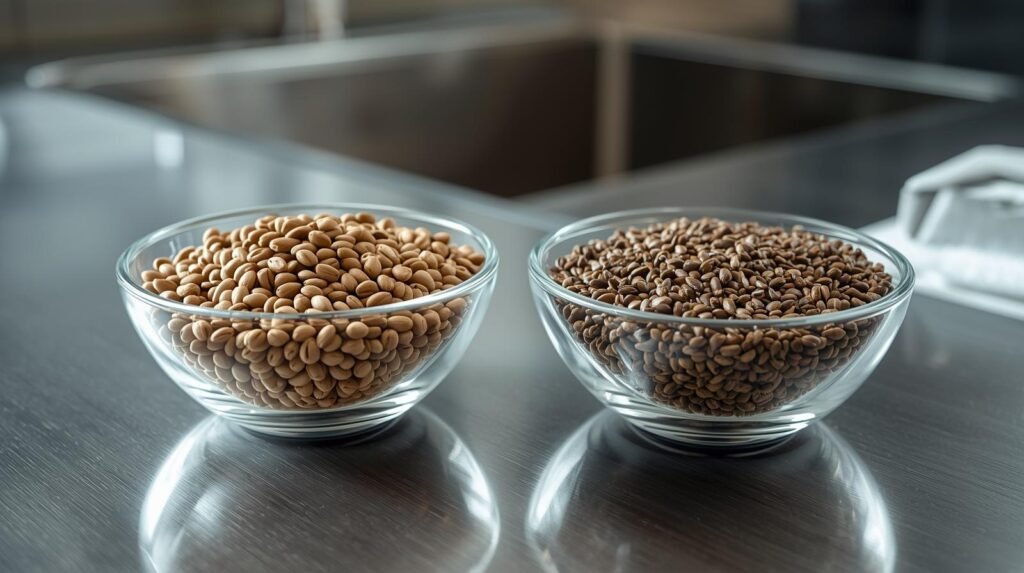
A homemade turkey seasoning blend is only as good as its storage. Even the best spices lose aroma, flavor, and potency if stored incorrectly, especially in hot and humid Asia-Pacific climates.Why Proper Storage of Spices Matters
Spices are delicate and lose their potency when exposed to three main enemies:- Air (Oxygen): Oxidation dulls both the color and flavor of your spices over time.
- Heat: High temperatures break down essential oils, reducing aroma and depth of taste.
- Moisture: Even small amounts can cause clumping, caking, or even mold.
Best Containers for Turkey Seasoning
Proper storage keeps your homemade Turkey spice blend fresh, aromatic, and flavorful for months or even years. Here are the top options for different needs:1. Airtight Glass Jars – Ideal for Most Home Cooks
- Why: Glass is non-porous, eco-friendly, reusable, and prevents odors from seeping in.
- Size Tip: Use jars that match your batch size; less empty air means longer freshness.
- Recommended Options: Mason jars, Lock & Lock glass spice jars..
- Storage Tip: Keep jars in a dark cupboard to protect against light, which can degrade color and flavor.
2. Vacuum-Sealed Mason Jars For Long-Term Storage
- Remove air using a vacuum sealer or specialized jar attachment.
- Add an oxygen absorber for maximum shelf life.
- Expected Shelf Life:
- Whole spices: 3–4 years
- Ground spices: 2–3 years
- Spice blends: 1–2 years
3. Mylar Bags + Oxygen Absorbers – Bulk or Professional Use
- Perfect for large batches, gifts, or long-term prep.
- Place jars or loose spices inside Mylar bags with oxygen absorbers and vacuum seal.
- Shelf Life: 2–10 years when stored in a cool, dark place, depending on the spice type.
Ideal Storage Conditions
To preserve maximum flavor, aroma, and color, store your spice blend under the following conditions:- Temperature: Keep below 70°F (21°C) to prevent heat from breaking down essential oils.
- Humidity: Store in a dry, low-humidity environment; avoid areas prone to steam or moisture.
- Light: Protect from light by keeping spices in dark cabinets or drawers. Amber jars can help filter out sunlight.
- Location: Keep your spice jars away from heat sources such as the stove, oven, dishwasher, or direct sunlight.
Step-by-Step Guide for Maximum Freshness
Proper handling and storage immediately after making your spice blend ensures maximum aroma, flavor, and longevity.Immediate Steps After Making the Blend
- Cool Completely: Let the blend reach room temperature. Warm spices can trap moisture, increasing the risk of mold.
- Ensure Dryness: All ingredients should be completely dry before storing.
- Mix Thoroughly: Stir well so every spoonful has balanced flavor.
Packaging
- Use clean, dry glass jars for best results.
- Fill jars to about ¾ full to leave headspace for air expansion.
- Wipe jar rims before sealing to ensure a proper airtight closure.
- Optional: Add silica gel packets, uncooked rice, or dried bay leaves to help absorb any residual moisture.
Labeling
- Clearly write the blend name (e.g., “Turkey Spice Blend 2026”).
- Include the date made and a “Best By” date (typically 12–24 months).
- Optional: List main ingredients if gifting.
Ongoing Storage Tips
- Keep jars in a cool, dark pantry or cabinet to protect against heat and light.
- Close jars tightly after each use to maintain freshness.
- Avoid scooping spices over steaming pots or with wet utensils, which can introduce moisture.
- Check freshness monthly by smelling and tasting a small pinch (see freshness test below).
Shelf Life Guide
| Storage Method | Expected Shelf Life | Notes for Asia-Pacific |
| Airtight glass jar (pantry) | 1–2 years | Keep away from heat/humidity |
| Vacuum-sealed jar | 2–3 years | Excellent for bulk batches |
| Mylar + oxygen absorbers | 2–10 years | Pro-level storage or gifts |
| Plastic container | 6–12 months | Only if airtight; avoid sunlight |
| Original spice bottles | 4–8 months | Standard retail containers lose flavor quickly |
Optional Freezer Method for Long-Term Storage
Freezing your Turkey spice blend is a great option if you want to maximize shelf life while preserving aroma and flavor.- Portioning: Divide the blend into 50–100 g (1.5–3.5 oz) zip-top bags and flatten them for easy stacking.
- Vacuum Seal: If possible, vacuum-seal the bags to remove air and prevent freezer burn.
- Shelf Life: Stored properly, the blend can last 18–24 months without losing its vibrant flavor.
- Before Use: Remove the needed portion 2–3 days in advance. The spices will regain their freshly ground aroma and potency.
Quick Do’s & Don’ts for APAC Kitchens
| Do | Don’t |
| Keep spices in airtight containers to preserve aroma and flavor | Leave spices on open shelves, exposing them to air and moisture |
| Store in the fridge or freezer to control humidity in tropical climates | Use wet spoons, which introduce moisture and risk mold |
| Lightly toast whole spices before mixing to unlock essential oils | Add fresh garlic or onion to the blend—it will spoil quickly |
| Grind spices just before sealing to maximize potency | Store near stove, oven, or in direct sunlight, which degrades flavor |
How to Test Your Turkey Spice Blend for Freshness
Ensuring your spice blend is fresh and potent is easy with a simple 3-step test:- Visual Check: Look for vibrant, uniform color, with no clumps, mold, or signs of insects.
- Smell Test: Rub a small amount between your palms. Fresh spices release a strong, complex aroma.
- Taste Test: A pinch should deliver bold, layered flavor. If it tastes flat, dull, or stale, it’s time to replace the blend.
Frequently Asked Questions (FAQs)
Can I use homemade turkey seasoning for chicken, duck, or lamb?
Yes. This seasoning blend works beautifully on chicken, duck, roast lamb, vegetables, and even potatoes. Reduce rosemary and sage slightly for chicken for a lighter flavor.
Do I need to add salt to my turkey seasoning blend?
If using the blend as a dry brine, salt should be added separately so you can control sodium levels. For quick seasoning, you may pre-mix salt directly into the blend.
How much homemade turkey seasoning should I use per kilogram?
Use 1 to 1.5 tablespoons per kilogram of turkey for full coverage without overpowering the natural flavor of the meat.
Can I use this seasoning blend on boneless turkey breast?
Yes. Boneless turkey breast needs less resting time, say 2 to 6 hours is ideal, since seasoning penetrates faster than with a whole bird.
Is smoked paprika necessary for turkey seasoning?
Smoked paprika adds depth, color, and subtle barbecue flavor, but you can replace it with sweet paprika for a milder profile.
Why does turkey sometimes taste bland even after seasoning?
This happens when seasoning is applied too late or only on the skin. For deep flavor, seasoning must reach the meat through dry brining or under-skin application.
Can I prepare turkey seasoning weeks in advance?
Yes. You can prepare and store your seasoning up to 6 months in advance in an airtight container stored away from heat and humidity.
Should I rinse off excess seasoning before roasting?
No rinsing is needed. If oversalted, gently wipe the surface with a damp paper towel, but never rinse the turkey under water.
Does turkey need oil if I use herb butter?
No. Herb butter already provides enough fat. Adding oil on top may cause uneven browning and excess smoke.
Can I use this seasoning for air-fryer turkey recipes?
Yes. Reduce sugar content (if any) and roast at 180°C (356°F) for even caramelization without burning.
Is it safe to leave seasoned turkey uncovered in the fridge?
Yes this is recommended for crispy skin when using dry brine or dry rub. Always place the turkey on a rack with airflow underneath.
Why does uncovered refrigeration create crispier skin?
Cold circulating air removes surface moisture, allowing the skin to become paper-dry, which turns ultra-crispy during roasting.
Can I freeze turkey after seasoning it?
Yes. You can freeze seasoned turkey for up to 1 month. Thaw completely in the fridge before roasting for even cooking.
What’s the biggest turkey seasoning mistake home cooks make?
The biggest mistake is seasoning too late or using only surface seasoning without salt penetration.
Can I use this seasoning blend for smoked turkey?
Absolutely. This blend works extremely well for smoking, especially when paired with applewood or hickory.
Should I season the turkey cavity too?
Yes. Lightly season the cavity and add lemon peel, bay leaf, and herbs for internal aroma without overpowering the meat.
Does turkey seasoning affect gravy flavor?
Yes drippings carry the seasoning into the gravy, creating a deep, restaurant-style flavor base.
Can I use pre-ground mustard instead of mustard seeds?
Yes. Use ½ the quantity of ground mustard compared to whole seeds for balanced heat.
Why does turkey need resting time after roasting?
Resting allows juices to redistribute, preventing dry meat when carving and improving overall tenderness.
Is homemade turkey seasoning healthier than store-bought?
Yes. Homemade blends are free from fillers, preservatives, artificial colors, and excess sodium, making them cleaner and more nutrient-dense.
Medical Disclaimer:
The information provided in this article is for educational and informational purposes only and is not intended as medical advice. Always consult a qualified healthcare provider before starting any new dietary supplement, herbal remedy, or wellness routine, especially if you have underlying health conditions, are pregnant or breastfeeding, or are taking prescription medications.
Impu Irani is a cookbook author behind Leena Spices, where he shares practical, easy-to-follow guides on homemade spice blends, herbs, and natural cooking. His work helps home cooks create fresh, flavorful meals using simple ingredients and traditional methods. Download his free Spice Blending eBook and start your journey to cleaner cooking today!
Disclosure Note
We are committed to creating high-quality, helpful content for our readers. We do not accept payment in exchange for writing our articles, and we personally cover the costs of running this website, including hosting, tools, and maintenance.
To support the site, we display ads and may earn a small commission from affiliate links if you choose to make a purchase—at no extra cost to you.
Your support helps us continue sharing valuable content with the community.
If you’d like to support us, here are a few simple and free ways:
- Share our content with your friends and family
- Engage with us on social media
- Follow us on Facebook
You can also learn more by visiting our disclaimer page:
https://leenaspices.co.nz/disclaimer/
As a thank you, feel free to download our Free Spice Recipe eBook.
Download a Free Leena Spices Recipes Cookbook