The Complete Guide to Drying Lemons at Home | Leena Spices
Table of Contents
- Why Dehydrate Lemons at Home
- Key Takeaways: Drying Lemons at Home
- Choosing the Right Lemons
- Essential Preparation Steps (For All Drying Methods)
- Method 1: Oven Drying
- Method 2: Dehydrator Drying
- Method 3: Air Drying and Sun Drying
- Alternative Method: Air Fryer
- Temperature and Time Quick Reference Chart
- Temperature and Time
- How to Tell When Lemons Are Fully Dried
- Proper Storage for Maximum Shelf Life
- Troubleshooting Common Issues When Drying Lemons
- Making Dried Lemon Powder
- FAQs About Dehydrating Lemons
Why Dehydrate Lemons at Home?
Drying lemons at home is a practical, cost-effective, and flavorful way to preserve this versatile fruit. By dehydrating lemons, you can extend their shelf life from just a few weeks to up to a year or more, reducing waste and ensuring you always have citrus on hand for cooking, baking, teas, and garnishes. Home-dried lemons retain much of their natural flavor, aroma, and nutrients, and can even be transformed into lemon powder for spice blends or seasoning. Unlike store-bought alternatives, homemade dried lemons give you full control over quality, freshness, and ingredients, making them a healthier, sustainable, and convenient addition to any kitchen. Whether you want to save money, enjoy seasonal lemons year-round, or add a unique touch to your culinary creations, drying lemons at home is both rewarding and versatile.

Key Takeaways: Drying Lemons at Home
What is the best way to dry lemons at home?
Lemons can be dried using three main methods: dehydrator, oven, or air/sun drying. A dehydrator offers precise temperature control and even airflow, preserving color and flavor. Oven drying is accessible for most kitchens, while air/sun drying works in hot, dry climates with good ventilation. All methods require uniform slices and proper preparation.
How do I prepare lemons for drying?
Start by selecting fresh, firm lemons—organic if using the peel. Wash thoroughly, slice 1/8–1/4 inch thick, remove seeds, and pat dry. Optional steps include blanching to reduce bitterness and enhance color. Uniform slicing ensures even drying, whether using an oven, dehydrator, or air drying.
How do I know when lemon slices are fully dried?
Properly dried lemons should feel dry and slightly brittle, snap when bent, and have no tacky or cool spots. A paper towel test helps confirm dryness—if moisture transfers, continue drying. Fully dried lemons prevent mold growth and ensure long shelf life.
What are the recommended temperatures and drying times?
Method | Temperature | Time | Best For |
Dehydrator (low) | 95–125°F | 18–36 hrs | Maximum color and flavor retention |
Dehydrator (standard) | 135°F | 8–12 hrs | Balanced speed and quality |
Dehydrator (fast) | 170°F | 6–10 hrs | Quick results |
Oven (low) | 170°F | 4–6 hrs | Most home kitchens |
Oven (higher) | 200°F | 3–4 hrs | Faster drying; monitor closely |
Air/Sun drying | Ambient | 2–7 days | Hot, dry climates |
Air fryer | 135°F | ~50–75 min | Small batches |
How should dried lemons be stored for maximum shelf life?
Store in airtight glass jars or containers in a cool, dark, dry place. Condition slices for 7–10 days after drying to equalize moisture. Dried lemons can last 6–12 months at optimal quality and up to 18–24 months when stored carefully. Add food-safe silica gel packets to prevent moisture in humid climates.
How can I turn dried lemons into lemon powder?
Once slices are fully dried, break them into pieces and grind in a spice grinder or high-powered blender. Pulse first, then grind to desired consistency. Condition the powder in a warm, turned-off oven or dehydrator for 15–30 minutes to remove residual moisture. Store in airtight containers; use within 3–6 months for best flavor.
What are the common issues when drying lemons and how do I fix them?
- Slices turned brown/dark: Lower temperature, reduce drying time, avoid sunlight.
- Sticky/tacky slices: Continue drying or pat with paper towel.
- Mold in storage: Ensure full drying, complete conditioning, and airtight containers.
- Uneven drying: Slice uniformly, rotate trays, and ensure good airflow.
- Extended drying time: Check slice thickness, temperature, and humidity; avoid overlapping slices.
Does dehydrating lemons affect nutrients or flavor?
Low-temperature drying preserves most nutrients and concentrates fiber, antioxidants, essential oils, and minerals. Vitamin C is partially lost at high heat, but dried lemons retain significant flavor and culinary value. Blanching can reduce bitterness and enhance aroma.
Why is dehydrating lemons beneficial beyond preservation?
Dehydrating lemons offers multiple advantages:
- Culinary versatility: Add to teas, spice blends, baked goods, and garnishes.
- Cost savings: Reduce waste and extend shelf life; save $50–$100+ annually.
- Environmental impact: Reduce grocery trips, packaging waste, and food waste.
- Cultural connection: Preserves centuries-old food traditions like Persian black limes (loomi).
- Convenience: Ready-to-use lemons year-round.
- Read the full blog here
Who benefits most from drying lemons at home?
Home cooks, chefs, culinary enthusiasts, homesteaders, educators, and small food business entrepreneurs. Benefits include: long-term storage, flavor concentration, educational uses, sustainable practices, homemade gifts, and potential commercial products.
Choosing the Right Lemons

Essential Preparation Steps (For All Drying Methods)
Proper preparation is the foundation for evenly dried, flavorful lemon slices, regardless of the drying method you choose. Begin by selecting fresh, firm lemons with unblemished skin. Unwaxed organic lemons are strongly recommended, especially if the peel will be used for culinary purposes. Conventional lemons are often coated with wax, which should be removed by scrubbing thoroughly with warm water and a little baking soda or vinegar. Meyer lemons are particularly well suited for drying due to their thinner skin and milder, less bitter flavor.
Wash the lemons thoroughly under cool running water, using a vegetable brush to remove dirt, wax, and surface residues. For extra cleanliness, you may soak them in a vinegar-water solution (one part white vinegar to three parts water) for five to ten minutes, then rinse well. Pat the lemons completely dry with a clean kitchen towel to prevent excess moisture during slicing.
Slice the lemons evenly using a sharp knife, serrated bread knife, or mandoline slicer. Aim for slices between 1/8 and 1/4 inch (3–6 mm) thick. Consistent thickness is essential for uniform drying. Thinner slices dry faster and become crisper, while slightly thicker slices retain a more leathery texture. As you slice, remove any visible seeds with a small knife or your fingers to prevent bitterness.
For best results, gently pat both sides of each slice with paper towels to remove surface moisture. This step, while optional, helps speed up the drying process and promotes more even dehydration. If you prefer brighter color and reduced bitterness, you can briefly blanch the slices in boiling water for one to two minutes, then immediately transfer them to ice water to stop the cooking process. Dry the slices thoroughly before proceeding to your chosen drying method.
Method 1: Oven Drying
Basic Oven Method
Begin by preheating your oven to its lowest setting, typically between 70–90°C (160–200°F). Many home cooks find the best balance around 75–80°C (170°F). Line a baking tray with parchment paper or, for better airflow, place a wire rack over a tray. Arrange the lemon slices in a single layer with no overlap, allowing air to circulate freely around each slice.Place the tray in the oven and dry the lemons for approximately three to six hours. Thinner slices and fan-forced (convection) ovens will dry faster, while thicker slices may take longer. Flip the slices once or twice during drying and rotate trays if using more than one to prevent uneven drying caused by hot spots.The lemons are ready when they appear slightly translucent, feel completely dry to the touch, and are no longer sticky or flexible. Properly dried slices should snap or crack rather than bend. Once done, transfer them to a wire rack and allow them to cool completely. Let the slices “air out” for several hours before sealing or storing to ensure any remaining surface moisture has fully evaporated.Tips to Maintain Color and Prevent Browning
Always use the lowest possible oven temperature. Higher heat speeds up drying but can caramelise natural sugars, causing darkening and browning. Rotate trays regularly and keep slices away from very hot areas, such as the back of certain ovens. For decorative purposes, slightly thicker slices dried slowly at low temperature tend to retain their shape and color more effectively.Extended Oven Drying Guidance
Set the oven to 170°F (77°C) or lower if possible, and use convection or fan mode for improved airflow. Drying time can range from three to eight hours, with most 1/4-inch slices finishing within four to six hours. Check progress hourly after the first three hours.For even better results, you can prop the oven door open slightly using a wooden spoon. This allows moisture to escape and prevents steaming, especially in non-fan ovens. Flip the slices every one to two hours and remove them once they are fully dry, crisp, and lightly curled at the edges. In humid climates, a short final rest in a warm, turned-off oven can help remove lingering moisture.If you don’t own a dehydrator, your oven can still produce excellent dried lemon slices. This method is practical, widely accessible, and ideal for home cooks looking for consistent, dependable results.Method 2: Dehydrator Drying
Using a food dehydrator is the most controlled and reliable method for drying lemons. It provides consistent airflow and precise temperature control, which helps preserve the lemons’ natural color, aroma, and flavor. For anyone drying citrus regularly or in larger batches, this method is considered the gold standard.
Standard Dehydrator Approach
Set the dehydrator to a “dried fruit” or similar setting, typically between 50–60°C (120–140°F). Arrange the lemon slices in a single layer on the dehydrator trays, ensuring they do not overlap so air can circulate evenly. The slices may sit close together, as they do not shrink significantly during drying.
Dry the lemons for approximately eight to ten hours at around 55°C, or for a longer period of eighteen to twenty-four hours at lower settings near 40°C. Drying time will vary depending on slice thickness, humidity, and the power of the machine. Flip the slices occasionally, especially if using an older or less powerful dehydrator, to promote even drying. The lemons are ready when there is no visible moisture in the pulp and the slices feel dry throughout. Allow them to cool completely before storing; properly dried lemon slices can keep for up to twelve months in airtight containers.
High vs. Low Temperature Dehydrating
Lower temperature drying preserves lemon color and delicate volatile aromas more effectively, but it requires more time. Higher temperatures, around 70–80°C (160–175°F), significantly reduce drying time to roughly two to four hours but increase the risk of browning and subtle flavor changes due to caramelisation of natural sugars. For best overall quality, low to moderate temperatures are recommended.
Equipment Needed
A food dehydrator of any brand, whether stackable or shelf-style, along with standard dehydrator trays, is sufficient for this method.
Step-by-Step Dehydrator Process
Begin by preparing your lemons following the preparation steps outlined earlier. Place the slices in a single layer on the trays, allowing airflow around each piece. Set the dehydrator temperature based on your priority: for the lightest color and best aroma retention, use 35–52°C (95–125°F) for eighteen to twenty-four hours; for faster drying, use 57–77°C (135–170°F) for six to twelve hours. A balanced, widely recommended range is 100–125°F, which preserves color while avoiding excessive drying time.
Run the dehydrator continuously and check progress at six-hour intervals. Flipping the slices every two to three hours is optional and usually unnecessary with modern machines that have good airflow. Test for doneness by cooling a slice and snapping it; properly dried slices should be dry, slightly brittle, and free of internal moisture when pressed.
Benefits of the Dehydrator Method
This method offers the most consistent results, excellent color retention at low temperatures, precise temperature control, and the ability to process large batches with minimal supervision. Once set, the dehydrator requires very little attention, making it ideal for both home cooks and small-scale producers.
Typical Drying Times
At low temperatures (95–125°F), expect drying times of approximately eighteen to thirty-six hours. At medium temperatures (135–170°F), most lemon slices finish within six to twelve hours, depending on thickness and humidity.
You can buy Pure and Authentic Dried Lemons From Amazon
You will find several reputable brands offering pre-made blends in both small jars and bulk packs.
CLICK HERE
Method 3: Air Drying and Sun Drying
Air / Sun Drying Basics
Prepare and slice the lemons as outlined earlier, then arrange the slices in a single layer on parchment-lined trays, mesh drying racks, clean window screens, or food-safe cardboard. In hot, arid conditions, place the trays in full sun or in a warm, well-ventilated spot with strong airflow. Leave the slices out during the day, but always bring them indoors at night or whenever humidity rises.Turn the slices periodically so they dry evenly and do not stick to the surface. Drying is complete only when the slices are fully dry throughout, with no soft spots, flexibility, or tacky areas. Storing lemons before they are completely dry greatly increases the risk of mould.Safety and Climate Notes
Air drying is not recommended in consistently humid, cool, or rainy climates, as lemons may spoil before sufficient moisture is removed. In marginal conditions, a safer approach is to partially dry the slices in the sun and then finish them in a low oven or dehydrator to ensure food safety. Sun drying can also darken the slices more than other methods, which is normal but worth noting if appearance is important.Best Conditions for Air or Sun Drying
This method works best in hot, dry regions such as Mediterranean climates, parts of Australia, India, Arizona, or Southern California. It is ideal during summer months with consistent sunshine, low humidity, and stable weather, and is best suited to small batches.Equipment Needed
Minimal equipment is required: a mesh screen or drying rack for good airflow, parchment-lined trays or clean cardboard as alternatives, cheesecloth or fine mesh netting to protect against insects, and a sunny, well-ventilated location.Step-by-Step Process
Start by preparing the lemons according to the standard preparation steps. Choose a drying location that offers warmth and airflow—outdoors in full sun is ideal, but a sunny windowsill or well-ventilated indoor space can also work. Arrange the slices in a single layer on your chosen surface and cover loosely with cheesecloth or fine mesh to keep pests and debris away.Place the slices in direct sunlight or a bright, airy spot. Flip them once daily to encourage even drying, monitor progress closely, and protect them from rain or unexpected weather changes. Always bring trays indoors overnight if there is any risk of dew or rising humidity.Drying Time
In full sun, lemon slices typically dry within two to five days. Partial sun or mixed air drying may take five to seven days, while indoor air drying in a warm spot can take seven to fourteen days, depending heavily on humidity and airflow.Benefits and Considerations
Air and sun drying require no electricity, minimal equipment, and follow a traditional, sustainable approach. However, results are less predictable than oven or dehydrator methods. In humid Asia-Pacific regions, combining sun drying with a fan or finishing in a low oven or dehydrator is strongly recommended to reduce the risk of spoilage and ensure safe, fully dried slices.Alternative Method: Air Fryer
An air fryer can be a practical option for drying lemons in small batches, provided the unit offers low-temperature settings. Because air fryers function as compact convection ovens, they circulate hot air efficiently and can dry citrus much faster than a standard oven. Results, however, vary significantly depending on the model, airflow strength, and minimum temperature.
Recommended Settings
Set the air fryer to its lowest temperature, ideally around 135°F (57°C). Preheat briefly, then arrange the lemon slices in a single layer in the basket, ensuring they do not overlap. Good airflow around each slice is essential for even drying.
Drying Process
Dry the slices for about 30 minutes, then flip them carefully. Continue drying for an additional 20 minutes, checking progress frequently. After this point, finish in five-minute intervals until the slices are fully dry. Because air fryers are powerful and compact, lemon slices can move from under-dried to over-browned quickly if left unattended.
Testing for Doneness
Remove the slices and allow them to cool completely before judging doneness. Properly dried slices should be crisp or very firm, with no flexibility or tacky spots. Residual moisture is more common with air fryers, so cooling and rechecking is especially important before storage.
Best Use Cases
This method is best suited for small quantities, quick drying, or situations where a dehydrator is not available. While convenient, it offers less consistency than a dehydrator and requires close monitoring to prevent browning or uneven drying.
Temperature and Time Quick Reference Chart
Drying Method | Temperature | Approximate Time | Best Use Case |
Dehydrator (Low Temperature) | 95–125°F (35–52°C) | 18–36 hours | Best color retention, aroma preservation, premium quality |
Dehydrator (Standard) | 135°F (57°C) | 8–12 hours | Ideal balance of drying speed and quality |
Dehydrator (Fast) | 170°F (77°C) | 6–10 hours | Faster drying when time is limited |
Oven (Low Heat) | 170°F (77°C) | 4–6 hours | Most home kitchens; reliable results |
Oven (Higher Heat) | 200°F (93°C) | 3–4 hours | Quicker drying; requires frequent monitoring |
Air / Sun Drying | Ambient temperature | 2–7 days | Hot, dry climates only; traditional method |
Air Fryer | 135°F (57°C) or lowest setting | 50–75 minutes | Small batches; quick alternative |


Temperature and Time
Drying time and temperature vary significantly depending on the method used, batch size, slice thickness, and ambient humidity. As a general rule, lower temperatures preserve lemon color, aroma, and delicate citrus oils better, while higher temperatures shorten drying time but increase the risk of browning and flavor changes.
Using a dehydrator at low temperatures between 95–125°F typically takes 18–36 hours and offers the best color retention and aroma preservation. This setting is ideal for premium-quality dried lemon slices intended for culinary or decorative use. A standard dehydrator setting around 135°F shortens drying time to approximately 8–12 hours and provides a good balance between speed and quality. For faster results, dehydrating at 170°F can reduce drying time to 6–10 hours, though slices should be monitored closely to prevent darkening.
Oven drying at a low temperature of about 170°F usually takes 4–6 hours and works well in most home kitchens. Increasing the oven temperature to around 200°F can reduce drying time to 3–4 hours, but slices must be checked frequently, as higher heat increases the chance of browning and uneven drying.
Air drying and sun drying rely entirely on ambient conditions and typically take between 2–7 days. This method is suitable only for hot, dry climates with low humidity and consistent airflow. In less ideal conditions, partial sun drying followed by oven or dehydrator finishing is recommended for safety.
Air fryers operate efficiently in small, enclosed spaces and can dry lemon slices at around 135°F in roughly 50 minutes or longer. This method is best for small batches and requires frequent checking, as compact airflow can cause uneven drying or trapped residual moisture.
This quick reference helps you choose the most suitable drying method based on your equipment, climate, time constraints, and desired quality of the final dried lemon slices.
How to Tell When Lemons Are Fully Dried and How to Store Them
Correct doneness and proper storage are essential for producing dried lemons that are safe, flavorful, and long lasting. Even slightly under-dried slices can spoil an entire batch, so careful checking and conditioning are just as important as the drying method itself.
How to Tell When Lemons Are Fully Dried
Fully dried lemon slices should be dry throughout, with no hidden moisture in the pulp or peel.
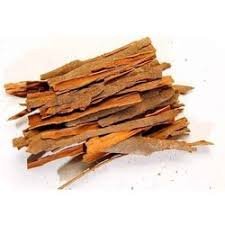
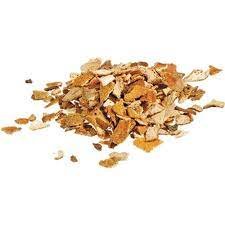
- Visual indicators include a darker overall color, which is normal and expected, as dried lemons do not remain bright yellow. The flesh should show no visible moisture in the cells or segments, and the peel should appear dry and leathery rather than glossy.
- Touch testing is one of the most reliable methods. Properly dried slices feel completely dry and slightly brittle. When bent after cooling, they should snap or crack cleanly rather than flexing. There should be no cool, sticky, or tacky areas when pinched between your fingers.
- Paper towel testing provides additional reassurance. Press a paper towel firmly against the surface of a slice. If any moisture transfers to the towel, the lemons require further drying.
Complete drying is critical because even small amounts of residual moisture can lead to mold growth, shortened shelf life, clumping during storage, and the loss of the entire batch.
Optional Step: Blanching to Reduce Bitterness
If bitterness from the white pith is a concern, blanching can be used as a flavour-improving step before drying. Slice the lemons as usual, then blanch them in boiling water for about two minutes. Immediately transfer the slices to an ice bath to stop cooking, then pat them thoroughly dry before proceeding with your chosen drying method. This technique reduces bitterness, mellows the flavour, and produces dried lemons that taste closer to fresh citrus.
The Conditioning Process: A Critical Quality Check
Conditioning is an essential step after drying and before long-term storage. It helps equalise any remaining moisture across the slices and reveals pieces that may not be fully dry.
To condition dried lemons, allow them to cool completely to room temperature. Place the slices in a clean glass jar, filling it no more than two-thirds full. Seal the jar and store it in a dark location. Shake the jar gently once daily for seven to ten days.
During this period, watch carefully for condensation, fogging, or water droplets forming on the inside of the jar. If moisture appears, remove all slices and return them to the oven or dehydrator for an additional two to four hours, then repeat the conditioning process. If any mold appears at any stage, discard the entire batch and extend drying time during your next attempt.
Proper Storage for Maximum Shelf Life
Once conditioning is complete and no moisture is present, dried lemon slices are ready for long-term storage.
- Storage containers should be airtight. Glass mason jars are preferred, followed by high-quality airtight containers or vacuum-sealed bags for the longest shelf life. All containers must be clean and completely dry before use.
- Storage conditions should be cool, dark, and dry. A pantry or cupboard away from direct sunlight and humidity is ideal. Room temperatures between 60–75°F (16–24°C) are suitable. Avoid areas with temperature fluctuations or moisture, such as near stoves or sinks. Food-safe silica gel packets may be added to absorb trace moisture, especially in humid climates.
Shelf Life and Ongoing Care
For best quality, dried lemons are ideally used within six to twelve months. With excellent drying and airtight storage, they may last up to eighteen to twenty-four months. Signs of spoilage include mold, off or musty odours, visible moisture, or extreme darkening beyond normal drying changes.
For best results, store lemon slices whole and grind them into powder only as needed. Label containers with the preparation date, keep different lemon varieties stored separately, and check jars monthly for any signs of moisture or deterioration.
Troubleshooting Common Issues When Drying Lemons
Problem: Slices Turned Very Dark or Brown
This usually occurs when the drying temperature is too high or the slices are exposed to excessive heat or light.Solutions: Use lower drying temperatures, ideally under 125°F (52°C), to prevent sugar browning. Reduce overall drying time and remove slices as soon as they are fully dry rather than leaving them in the heat longer than necessary. Avoid direct sunlight during storage, as light can continue to darken the slices over time. Be careful not to over-dry, especially with thin slices.Problem: Slices Are Sticky or Tacky
Sticky or tacky slices indicate that moisture is still present inside the lemon flesh.Solutions: Continue drying, as the slices are not fully done yet. Pat both sides gently with a paper towel to remove surface moisture, then return them to the oven, dehydrator, or air fryer. Increase drying time significantly and test again only after the slices have fully cooled.Problem: Slices Developed Mold in Storage
Mold growth is almost always caused by trapped moisture or improper storage conditions.Solutions: Ensure lemons are dried completely before storage, extending drying time if necessary. Always complete the conditioning process to equalise residual moisture and identify under-dried pieces. Store slices in a low-humidity environment and use airtight containers. If mold appears at any stage, discard the entire batch.Problem: Drying Is Taking Much Longer Than Expected
Extended drying times are usually related to environmental factors or slice preparation.Common Reasons: High humidity in your area slows moisture evaporation. Slices that are cut too thick take longer to dry. Insufficient airflow, low drying temperatures, or overlapping slices can also significantly extend drying time.Problem: Uneven Drying
Some slices drying faster than others is a common issue, especially in ovens or older dehydrators.Solutions: Cut slices as uniformly as possible to ensure consistent drying. Rotate trays or baking sheets more frequently to counter hot spots. Flip slices during the drying process, and make sure there is good air circulation around each slice with no overlap.Making Dried Lemon Powder
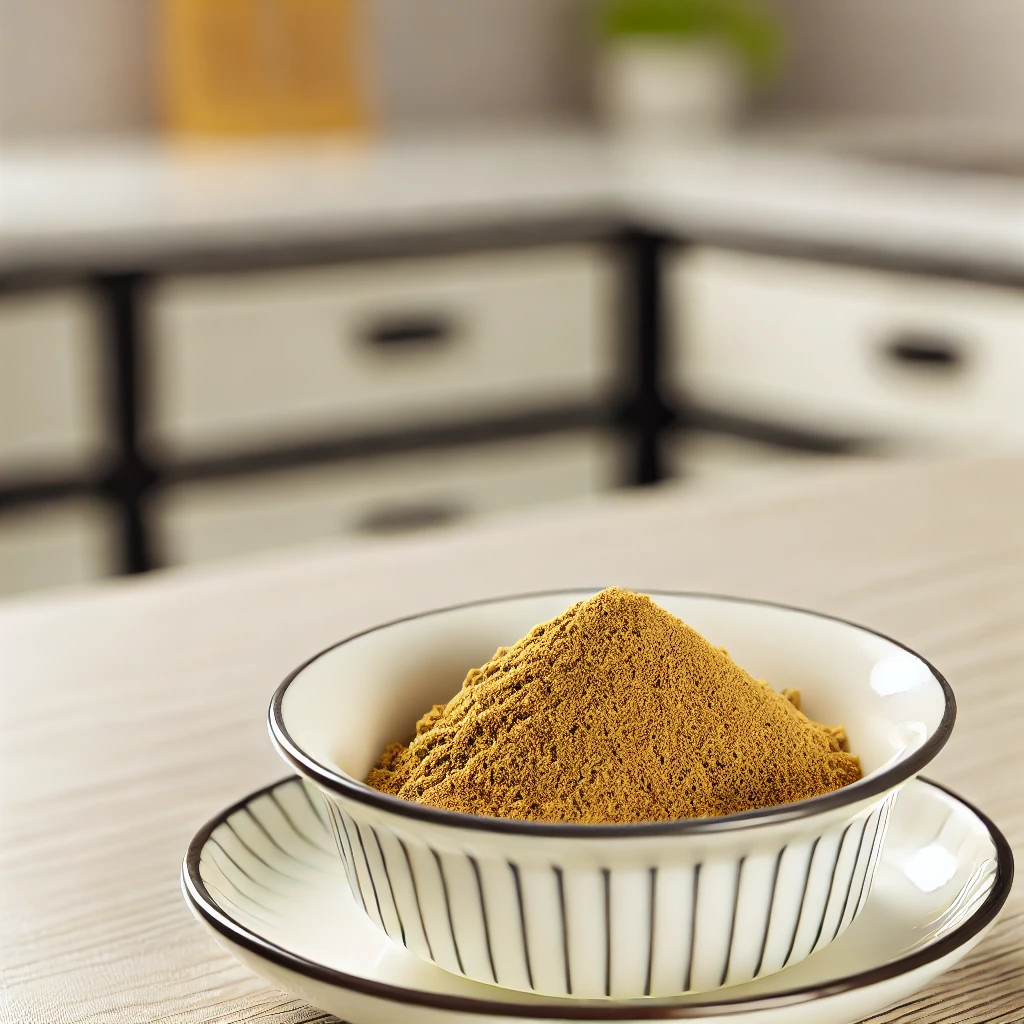
Once you’ve perfected dried lemon slices, transforming them into lemon powder adds a versatile ingredient to your pantry. Lemon powder is perfect for baking, seasoning, teas, spice blends, and flavoring dishes without the extra liquid.
What You’ll Need
- Completely dried lemon slices or peels
- Coffee grinder, spice grinder, or high-powered blender
- Airtight storage container
Step-by-Step Process
- Dry Completely
Ensure lemon slices or peels are fully dry and crisp. Slightly over-dried slices are better for grinding into powder, as any residual moisture can cause clumping or spoilage. - Break Into Pieces
Roughly break larger slices or peels into smaller pieces to fit easily into your grinder. - Grind
- Start by pulsing 4–5 times to break down the pieces.
- Then grind continuously until you reach the desired consistency:
- Fine powder: 30–60 seconds
- Coarser texture: 15–30 seconds
- Condition the Powder
Remove residual moisture to prevent clumping:- Spread the powder on parchment paper and place in a warm (not hot) turned-off oven for 15–30 minutes, or
- Return to a dehydrator in coffee filters for 15–30 minutes
- Cool and Store
Allow the powder to reach room temperature before transferring to an airtight container. Properly stored, lemon powder keeps its flavor for several months.
Tips for Best Results
- For a less bitter powder, peel lemons before drying and remove all white pith.
- Lemon powder tends to clump more than whole slices; include moisture absorber packets if possible.
- Store in airtight containers away from heat and light.
- Use within 3–6 months for optimal flavor.
- Grind small batches as needed rather than all at once to maintain freshness.
FAQs About Dehydrating Lemons
Isn’t fresh always better than dried lemons?
Not necessarily. Fresh lemons are ideal for recipes requiring juice or liquid volume, like lemonade or sauces. Dried lemons, however, excel as a complementary ingredient for cooking, baking, teas, spice blends, and garnishes. Both fresh and dried lemons have unique uses and can coexist in a well-stocked kitchen.
Does dehydrating lemons really save money?
Yes. Dehydrating lemons can reduce costs significantly if you:
- Buy lemons in-season or in bulk
- Grow lemons at home
- Frequently discard spoiled fresh lemons
- Use lemons regularly in recipes or beverages
By preserving lemons, you stretch your citrus budget while maintaining flavor and convenience.
Doesn’t dehydrating destroy nutrients?
Some nutrient loss especially vitamin C occurs at high temperatures, but many nutrients remain or become concentrated:
- Fiber: fully retained, especially in the peel
- Essential oils: concentrated, enhancing aroma and flavor
- Antioxidants: many survive dehydration
- Minerals: stable after drying
Lower-temperature drying preserves more vitamins. Compared to a fresh lemon left in the fridge for weeks, properly dehydrated lemons may retain more nutrients.
Isn’t this too much work?
Dehydrating lemons is mostly hands-off. Initial prep takes 2–3 hours, but the results last 12–18 months. This saves repeated shopping trips, constant spoilage management, and frequent lemon purchases. Batch processing is efficient, making the effort minimal relative to the convenience gained.
Are there environmental benefits to dehydrating lemons?
Yes. Dehydrating lemons reduces your carbon footprint and waste:
- Fewer grocery trips = less fuel consumption
- Reduced food waste = less methane from landfills
- No refrigeration needed = energy savings
- Seasonal eating = lower transportation emissions
- Bulk buying = less packaging waste
It also conserves water and supports sustainable growing practices.
How much money can I save?
- Regular lemon user (2 per week): Buying fresh year-round costs ~$179/year. Buying seasonal lemons and dehydrating can cost ~$79/year, saving ~$100.
- Lemon tree owner: Without dehydrating, many lemons go to waste. Dehydrating preserves excess fruit, with an estimated total value of ~$275/year, including homemade gifts.
Is dehydrating lemons a modern trend?
No. Citrus dehydration is an ancient practice:
- Black limes (loomi) in Persian and Iraqi cuisine
- Sun-dried lemons in Mediterranean regions
- Traditional preservation before refrigeration
By dehydrating lemons, you connect with centuries-old culinary traditions and sustainable seasonal eating practices.
What are the practical joys of dehydrating lemons?
- Transforming fresh fruit into a preserved pantry staple
- Filling your home with citrus aroma
- Watching the drying transformation
- Creating something useful and beautiful with your hands
- Instant access to lemon flavor year-round
- Pride, self-sufficiency, and homemade gift options
Are there advanced benefits for entrepreneurs or educators?
- Entrepreneurs: Create value-added products, sell at markets, develop signature blends, package for gifts, or launch online food businesses
- Educators: Teach food preservation, sustainable practices, science of dehydration, cultural food studies, and nutrition
- Homesteaders: Build a complete food preservation system, achieve year-round self-sufficiency, and plan for off-grid food security
Why should I start dehydrating lemons?
Dehydrated lemons offer:
- Financial savings: $50–$100+ per year
- Practicality: 12–18 months shelf life vs. 2–4 weeks
- Environmental benefits: reduce waste and carbon footprint
- Culinary versatility: unlock new flavors and applications
- Health: retain significant nutrients
- Convenience: always available, no prep needed
Whether you’re budget-conscious, sustainability-focused, a garden enthusiast, or a professional chef, dehydrating lemons is a smart, versatile, and rewarding practice.